Competitive pool
Bind: callouts, site plans and setups
Bind has two sites, A and B, and no mid: two one-way teleporters link the sides. It is back in the competitive queue since patch 13.08.
- Sites
- Site A · Site B
- Release
- June 2, 2020, patch 1.0
- Status
- Competitive pool
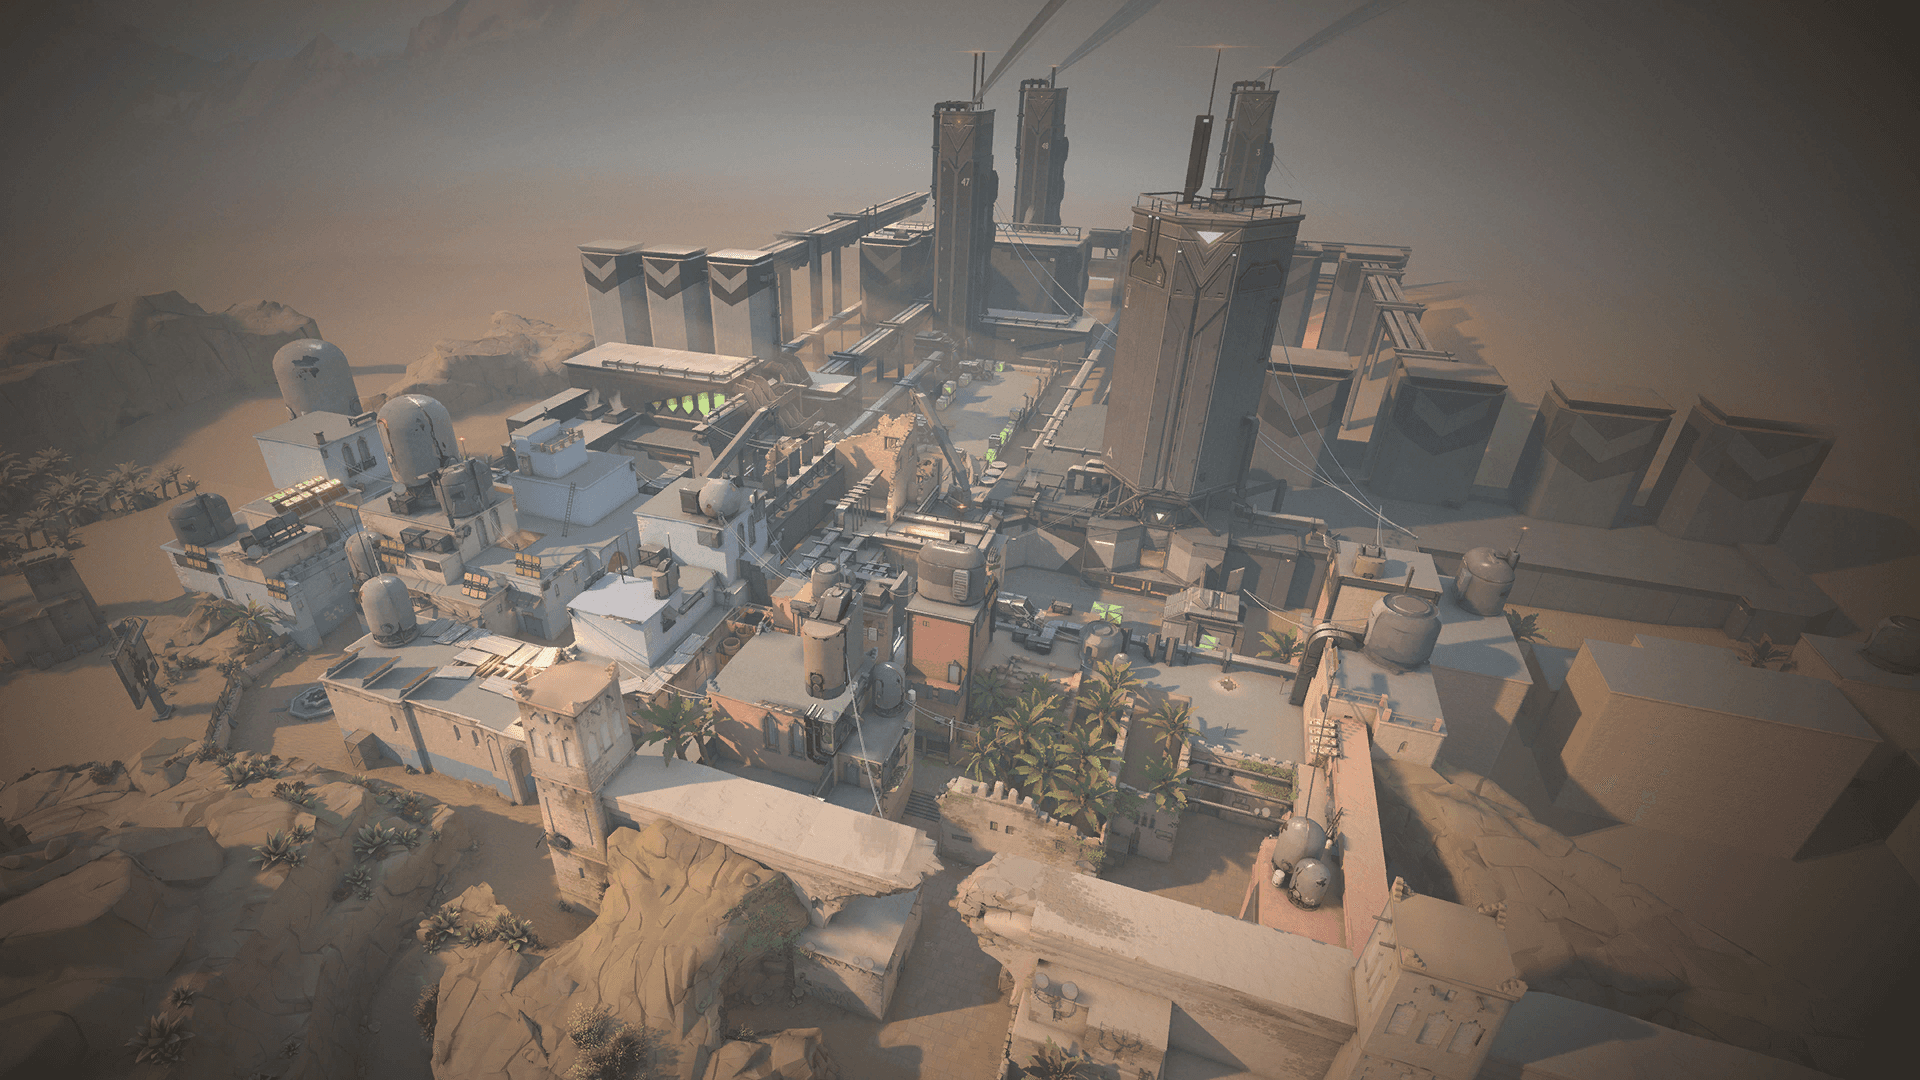
Callouts
The official in-game names, as your client shows them, with the English name you will often hear in voice comms.
Scroll the map to read every name.
Site A
| In-game name |
|---|
| A Exit |
| A Link |
| A Lobby |
| A Short |
| A Site |
| A Teleporter |
| A Bath |
| A Cubby |
| A Lamps |
| A Tower |
Site B
| In-game name |
|---|
| B Exit |
| B Hall |
| B Link |
| B Fountain |
| B Long |
| B Short |
| B Site |
| B Teleporter |
| B Window |
| B Elbow |
| B Garden |
Spawns
| In-game name |
|---|
| Attacker Spawn |
| Attacker Spawn |
| Defender Spawn |
Map layout
Bind has only two sites and no mid. On the minimap, A is on the right and B on the left; attackers come in from the bottom. You attack A through A Bath, from A Lobby, or through A Short, which runs along A Cubby and A Teleporter. You attack B through B Short, which leads to Hookah (B Window), or through B Long. Two one-way teleporters replace the mid: A Teleporter comes out near B Exit, and B Teleporter comes out at A Exit, in front of A Bath. A defender can switch from one site to the other in a few seconds, but he gets heard, and he leaves his position. The corridors are tight and duels happen up close: Hookah, A Bath and A Short are the places where the attack has to take info before entering. On defense, the threat is the flank: a player coming out of a teleporter lands behind those holding the site.
Key features
Two one-way teleporters
You enter a teleporter through its entrance wall. A Teleporter leads to B Exit, near B Short, and B Teleporter leads to A Exit. Abilities, the spike and dropped weapons also go through the teleporters.
Every use is heard
Every teleporter use makes a sound that both teams hear. Defenders use it to guess a rotation, attackers use it to fake a move and pull players from one site to the other.
Hookah and Cubby on B
Hookah (B Window) is a narrow passage that opens onto the B site. Right below it, B Cubby hides a defender. Dropping into Hookah without clearing Cubby is a well-known risk.
Heaven, the high ground on A
Heaven, which the official wiki calls A Tower, is the high position on A, reserved for defenders. It dominates the site from the back. Attackers smoke it with Lamps to cut the angles on A Short and A Bath. Its exact spot on the map is only approximate.
Site A
A is the big site on the right of the map. A truck sits in the center. On the attack side there are two entries: A Bath (players say Showers) and A Short. Defenders hold Lamps (U-Hall), the small room on the left, and Heaven (A Tower) up high. Few entries: smokes matter here.
Attack plan
Smoke Heaven and A Lamps first: these two smokes cut the view onto A Short and A Bath at the same time. Take control of A Bath with a flash or a damage zone, then enter through A Lobby and A Bath while the rest of the team pushes A Short. Plant in the A zone and stay in play from A Bath, facing the site, to punish a retake coming from Lamps.
- 1Smoke : Smoke Heaven (A Tower)
- 2Smoke : Smoke A Lamps
- 3Flash : Entry flash into A Bath
- 4Route : Entry through A Bath
- 5Route : Entry through A Short
- 6Plant : Plant in the A zone
- 7Hold : Post-plant from A Bath
Defense plan
Hold Lamps and Heaven to get two different angles on attackers coming out of A Bath. Smoke the A Bath entry and A Short to slow the rush before they take control of the map. Keep an eye on the teleporters: a player near A Short hears the enemy rotation. To retake the site, go through A Tower with the rest of the team, throwing a damage zone on the spike.
- 1Hold : Hold A Lamps (U-Hall)
- 2Hold : Hold Heaven (A Tower)
- 3Smoke : Smoke A Bath entry
- 4Smoke : Smoke A Short
- 5Route : Retake through A Tower
- 6Molly : Damage zone on the plant
Site B
B is on the left of the map. Hookah (B Window) opens onto the site, with B Cubby right below it. B Garden is the outdoor area before Hookah and B Long, and B Elbow is the bend on the side of the site. Lots of corners: smoke before you enter.
Attack plan
Smoke B Elbow and the space between the double crate and Default: these two smokes remove the angles that sentinels watch. Before dropping into Hookah, clear Cubby and the area below it with an ability (dart, dog, knife, grenade). Then split the team between B Short and B Long to force the defenders to choose. Plant in the B zone and hold Elbow: that is the position that makes the site hard to retake.
- 1Smoke : Smoke B Elbow
- 2Smoke : Smoke double crate and Default
- 3Info : Clear Hookah and Cubby
- 4Route : Entry through B Short and Hookah
- 5Route : Entry through B Long
- 6Plant : Plant in the B zone
- 7Hold : Post-plant from B Elbow
Defense plan
Hold Cubby to surprise a rush through Hookah, and watch Elbow with an ability or a player: attackers who take Elbow make B very hard to defend. Smoke the Hookah entry and the back of B Long to deny an Operator angle and force close duels. Don't put everyone on B: a teleporter flank arrives fast. Retake the site through B Hall.
- 1Hold : Hold B Cubby under Hookah
- 2Hold : Hold B Elbow
- 3Smoke : Smoke Hookah entry
- 4Smoke : Smoke back of B Long
- 5Info : Info on Hookah and Garden
- 6Route : Retake through B Hall
Agent setups
The placements top guides recommend on this map, ability by ability.
 Killjoy
All Killjoy setupsKilljoy B: two Nanoswarms in Hookah, Turret on Tube
Defense · Site B- 1
 Nanoswarm : Nanoswarm in the corner between the big crate and the Hookah wall
 - 2Nanoswarm : Second Nanoswarm thrown on a small cushion on the floor, in Hookah
- 3
 ALARMBOT : Alarmbot against the Hookah entrance toward the site
 - 4
 TURRET : Turret on Tube, a bit to the left when looking from Hookah (unofficial name, approximate position)
Killjoy B: lock down B Garden with Nanoswarms and a hidden Turret
Defense · Site B- 1Nanoswarm : Nanoswarm on the middle of the left B Garden door frame, crouched
- 2Nanoswarm : Second Nanoswarm at the intersection of the lines of the right wall corner and a mark on the wall
- 3ALARMBOT : Alarmbot against the right door frame, out of the attackers' sight
- 4TURRET : Turret on a wooden plank, facing the site
 Cypher
All Cypher setupsCypher A: wires on A Short and Lamps, camera on Cubby
Defense · Site A- 1
 Trapwire : Wire from the left teleporter hinge, attached to the A Short crates
 - 2Trapwire : Wire from the right teleporter hinge, attached to the outer Lamps wall
- 3
 Spycam : Camera on the vents above Cubby, view on A Short and the Lamps entrance
Cypher B: wire and cage on Garden, wire in Hookah
Defense · Site B- 1Trapwire : Wire along the right side of the B Garden entrance
- 2
 Cyber Cage : Cyber Cage on the small white mark on the floor, to hide the wire
 - 3Trapwire : Wire against the Hookah entrance wall, stretched toward the crate cushion
Bind tips
- Every teleporter use is heard by everyone: play it to fake a rotation, or listen for it to know a player is switching sites.
- Avoid jumping into Hookah without clearing Cubby: an ability (dog, knife, grenade, dart) costs less than dying on the spot.
- In Bind's corridors, duels are at short range: keep your crosshair at head height on the next corner (Cubby, Lamps, Elbow) rather than on the ground.
- If you defend, don't rely on a single player for the flank: a Turret, a wire or a dedicated player must watch your back when a teleporter is free.
- Killjoy and Cypher setups get memorized fast: vary the placements from round to round so the enemies don't pre-shoot them.
Other maps
 AbyssCompetitive poolSite A · Site BAbyss is a two-site map with three lanes and no boundary walls: falling into the void kills instantly. It has been in the competitive queue since patch 13.04, in August 2026.4 setups
 CorrodeCompetitive poolSite A · Site BCorrode is a two-site, three-lane map in a medieval fortress, with a long, narrow mid. It has been in the competitive queue since patch 11.00 and came back in 13.08.4 setups
 HavenCompetitive poolSite A · Site B · Site CHaven is the three-site map: A at the top of the minimap, B in the middle, C at the bottom. Attackers start from the east and pick a target, while defenders have to cover everything.4 setups
 LotusCompetitive poolSite A · Site B · Site CLotus is a three-site map, A, B and C, set in a city of flowers in India. It plays with rotating doors, a breakable wall on the A side and a silent drop.6 setups
 SummitCompetitive poolSite A · Site BSummit is a two-site map with three lanes, set in a Radiant academy in the mountains. Three reactive walls close during the round and change the rotations.
 SunsetCompetitive poolSite A · Site BSunset is a classic two-site, three-lane map set in Los Angeles. Mid is wide and links the two sites through connectors: whoever holds it sets the pace of the round.5 setups
 AscentOut of the competitive poolSite A · Site BAscent is a two-site map inspired by Venice, with a big open mid linking the two sites. It left the competitive queue in patch 13.08.4 setups
 BreezeOut of the competitive poolSite A · Site BBreeze is a two-site map on an island. Largely rebuilt at patch 12.00, it left the competitive queue at patch 13.04: be wary of guides from before January 2026.
 FractureOut of the competitive poolSite A · Site BFracture is a two-site map where attackers start at opposite ends, linked by a zipline, against defenders in the center. It left the competitive queue at patch 13.00.4 setups
 IceboxOut of the competitive poolSite A · Site BIcebox is a two-site map set in a frozen worksite: lots of height, stacked containers, a zipline at A and a mid split by the tube and the boiler.4 setups
 PearlOut of the competitive poolSite A · Site BPearl is a two-site map set in an underwater city, with no ropes and no teleporters. It left the competitive queue at patch 13.00.
 SplitOut of the competitive poolSite A · Site BSplit is a two-site map, A at the top and B at the bottom, linked by a mid. Narrow, full of high ground and ropes, it has a reputation for favoring defense.
A plan won't aim for you: measure your aim.
Sources
- playvalorant.com (opens in a new tab)
- wiki.playvalorant.com (opens in a new tab)
- playvalorant.com (2) (opens in a new tab)
- esports.net (opens in a new tab)
- switchbladegaming.com (opens in a new tab)
- playerassist.com (opens in a new tab)
- playerassist.com (2) (opens in a new tab)
- playerassist.com (3) (opens in a new tab)
- dignitas.gg (opens in a new tab)
- gfinityesports.com (opens in a new tab)
Updated on October 15, 2026
Patch 13.08 data. Map names, callouts and minimaps: Riot Games, via valorant-api.com.